If you are a home gardener looking for a way to feed your garden with natural nutrients, hot compost can become one of your best allies. This technique allows us to obtain mature compost in much less time than conventional methods, which is especially useful when we need to improve the soil quickly between seasons or revitalize demanding crops. And although it requires a little more attention at the beginning, its results are worth it: a rich, balanced and ready-to-use compost in a few weeks.
For all these reasons, in this guide we accompany you step by step so that you can easily put it into practice from home, using accessible resources and respecting the environmental balance.
What is Hot Compost?
Hot composting or thermophilic composting is a composting method that accelerates the decomposition of organic waste by actively controlling three key factors: temperature, aeration and the balance between green and brown materials. Unlike traditional (cold) composting, which can take six months to a year to complete, hot composting allows us to obtain compost in a much shorter time.
This process is based on the activity of thermophilic microorganisms, i.e. bacteria and fungi that thrive at elevated temperatures, usually between 50 °C and 80 °C, which multiply and generate heat while decomposing organic matter, which in turn accelerates decomposition and helps eliminate odors, weed seeds and even possible pathogens.
When it comes to hot composting, it requires a certain degree of human intervention. It is not enough just to accumulate scraps, but it is necessary to mix the materials well, check the humidity, control the temperature and turn it regularly to ensure that all the contents degrade evenly. In this way, what we will obtain will be a high quality compost, dark, spongy and full of useful microbial life for the soil.
And although it may seem more complex than traditional composting, this method is perfectly viable for home or urban gardens. It is ideal for those who produce a considerable amount of green and brown waste, or for those who want to generate compost quickly for use at a key moment in the crop.
Uses of Hot Compost
One of the great advantages of hot compost is its versatility. Being a mature compost, well decomposed and free of pathogens or unwanted seeds, you can use it in virtually any stage of cultivation and in different areas of your garden or orchard.
- Add warm compost to the soil prior to seeding or planting: This helps improve soil structure, increase moisture retention and provide a wide diversity of plant-available nutrients from the start.
- Amendment for demanding crops: Plants that consume a lot of nutrients such as tomatoes, squash, peppers or cabbage, appreciate a good dose of well-cured compost. You can apply it directly in the planting holes, around the stem (without touching it directly) or in the furrows, as a localized soil improvement that will gradually release nutrients.
- As a base for seedling or potting substrates: Once cold and well matured. It provides microbial life, structure and stable organic matter, which favors the development of healthy roots and more resistant plants.
- Accelerator of other composting processes: It can also be used as an “activator” or inoculant for other slower compost piles. Because it is loaded with active microorganisms, it helps accelerate the decomposition of new materials when mixed with them.
- For flower beds, terraces and ornamental areas: Although we associate it with the vegetable garden, hot compost is perfect for flower beds, fruit trees or ornamental hedges. Applying it as mulch improves the soil, retains moisture and reduces the need for chemical fertilizers.
How to Prepare
Although hot compost requires a little more attention at first, once you understand the process, it’s simple and very satisfying. Here’s how to make it at home, from the materials to maintaining the pile:
Materials Needed
To make good hot compost, we need two types of waste:
- Green waste (rich in nitrogen), such as fruit and vegetable waste, coffee grounds, freshly cut grass, green leaves or fresh manure.
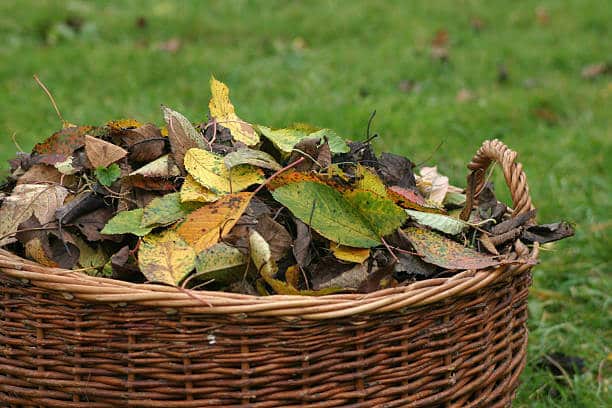
- Brown waste (rich in carbon): such as dry leaves, shredded branches, cardboard without ink, straw or sawdust (in small quantities).
The ideal ratio of materials to achieve a good hot compost will be 2 parts brown waste to 1 part green waste, since the balance between carbon and nitrogen is key to reach high temperatures and achieve efficient decomposition.

Step by Step
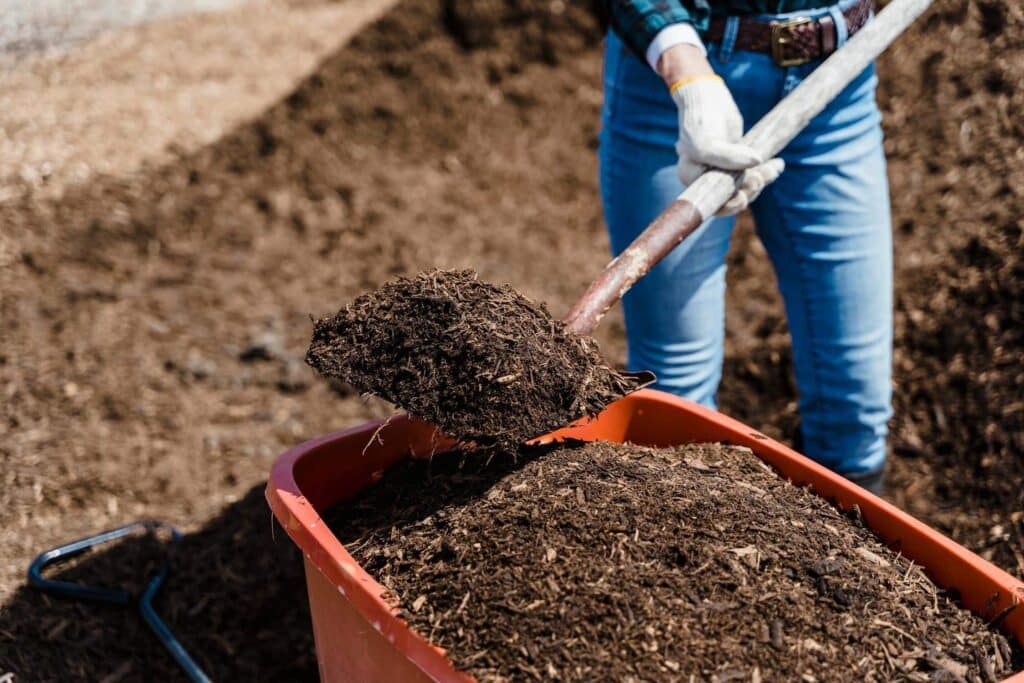
1º Choose a good place: Place your pile or composter directly on the ground, in a place with some shade and protected from the wind. It is important that it is in contact with the soil to allow the entry of beneficial organisms (such as earthworms or bacteria) and facilitate drainage.
2º Create the pile with sufficient volume to generate heat: Ideally, it should be at least 1 m³ (1 meter high x 1 meter wide x 1 meter deep). If it is smaller, it will be difficult to maintain the right temperature.
3º Alternate layers of brown and green materials: Mix lightly to favor the contact between both. It is advisable to chop up large materials to facilitate their decomposition.
4º Control the humidity: The compost should have the humidity of a wrung out sponge: neither dry nor soaked. If when you take a handful of the material you can squeeze it and only one or two drops come out, it is perfect. If, on the other hand, it is too wet, you can add more dry residues (such as leaves or cardboard) and stir the pile well. If it is too dry, simply water a little when adding the materials.
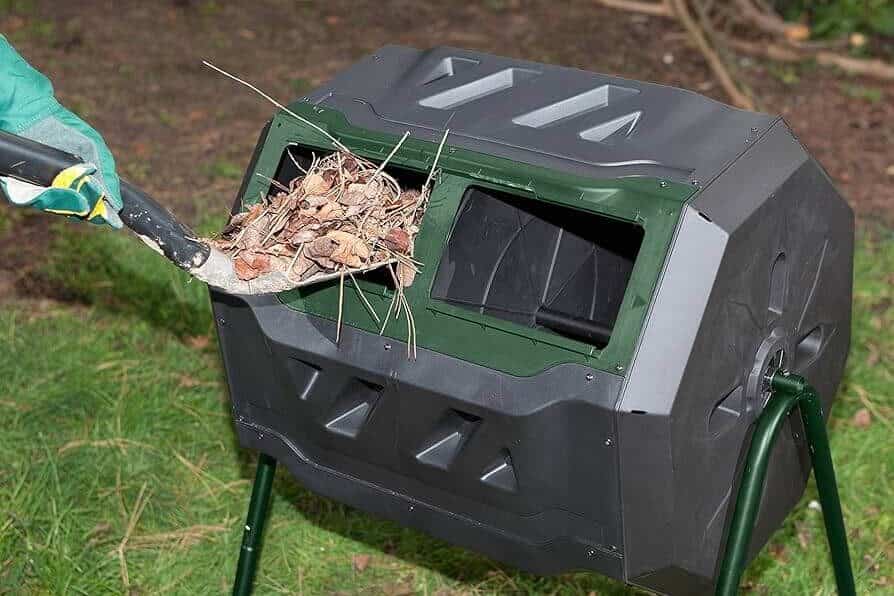
5º Mix and observe: During the first week, the microorganisms will begin to decompose the materials and the temperature will rise. It is a good sign if when you put your hand in (carefully) you notice heat. After the second or third day, it is a good idea to stir the pile every 3-5 days to oxygenate it and distribute the heat. You can also use a compost thermometer to check that it is between 50 °C and 80 °C.
6º Keep the process going for 2-4 weeks: With good care, your hot compost can be ready in about 3 – 6 weeks, depending on the climate, materials and frequency of mixing.
What if I’m short on space?
Don’t worry, even if the space required to make hot compost is 1 m³, there are always other equally valid options to achieve the results that this type of compost offers. And these are:
- Rotating drum composting: Although more expensive, this system allows us to make hot compost in small spaces. It allows for good control of humidity and temperature, and by rotating the drum frequently, oxygenation is favored and decomposition is accelerated.
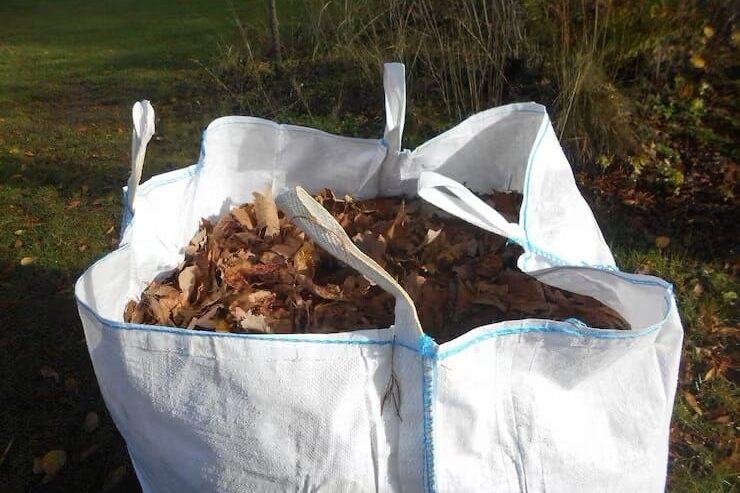
- Use of jute, raffia or geotextile bags or sacks: These containers allow some ventilation and can be placed in sunny corners. If filled with an appropriate proportion of waste and mixed every few days, they work surprisingly well for small amounts of hot compost.
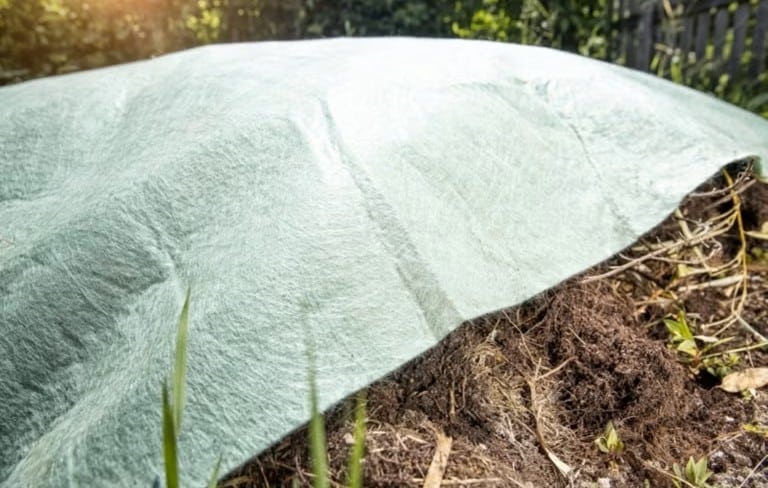
- Small batch composting with extra insulation: If you can’t reach the ideal volume in a single pile, you can work in smaller batches, making sure to insulate the pile thermally (with surrounding straw, tarpaulin, cardboard or even old blankets). This helps to retain the heat generated by the microorganisms and keep the process active.
In short, if you do not have the ideal space for a compost pile do not worry, with a little ingenuity, perseverance and willingness to experiment, it is possible to adapt hot composting to your conditions and still get a fast, effective and full of life compost for your garden. In addition, if you want to speed up decomposition even more and enrich the final result, you can add finished bokashi to the mix. This will provide beneficial microorganisms and additional nutrients that will enhance the quality of the compost.
Here are a number of related products that may be useful to you when making hot compost:
🍂 Rotating Composter
Speed up the composting process, aerate materials effortlessly and obtain a quality home compost.
👉 View on Amazon🏴 Geotextile Fabric
A basic for maintaining humidity, regulating temperature and promoting efficient composting.
👉 View on Amazon🌡 Compost Thermometer
Measure the internal temperature of the pile and make sure that the compost reaches ideal conditions.
👉 View on Amazon