Going on vacation and don’t want your plants to die in the process? Or are you simply looking for a more efficient and sustainable way to water your urban garden without spending a dime? A DIY drip irrigation system using plastic bottles is the perfect solution.
In this guide, we’ll show you how to build your own recycled automatic watering system, perfect for pots and small vegetable patches.
Why Choose DIY Drip Irrigation?
Drip irrigation not only saves water by directing it straight to the roots, but it also maintains consistent soil moisture, preventing plant stress. Plus, by using plastic bottles, you’re giving a second life to a common waste item.
Materials Needed
You’ll only need a couple of things you probably already have at home:
- Plastic bottles of various sizes (0.5L, 1.5L, or 2L depending on the pot size).
- An awl, needle, or thin nail.
- Cotton cord or a piece of old fabric (for the capillary action method).
- Water.
Method 1: The Upside-Down Bottle (The Classic)
This method is perfect for plants that need a lot of water or for large pots during summer.
- Clean the bottle: Remove labels and rinse it thoroughly.
- Puncture the cap: Using a hot awl, make a small hole in the center of the cap. If the soil is very clayey, make two.
- Cut the base: Remove the bottom of the bottle (this will serve as a funnel to refill it without having to remove it).
- Installation: Bury the neck of the bottle in the soil, near the plant, ensuring it’s stable.
- Refill: Pour water into the top opening. You’ll see it start to bubble as the water is released drop by drop.
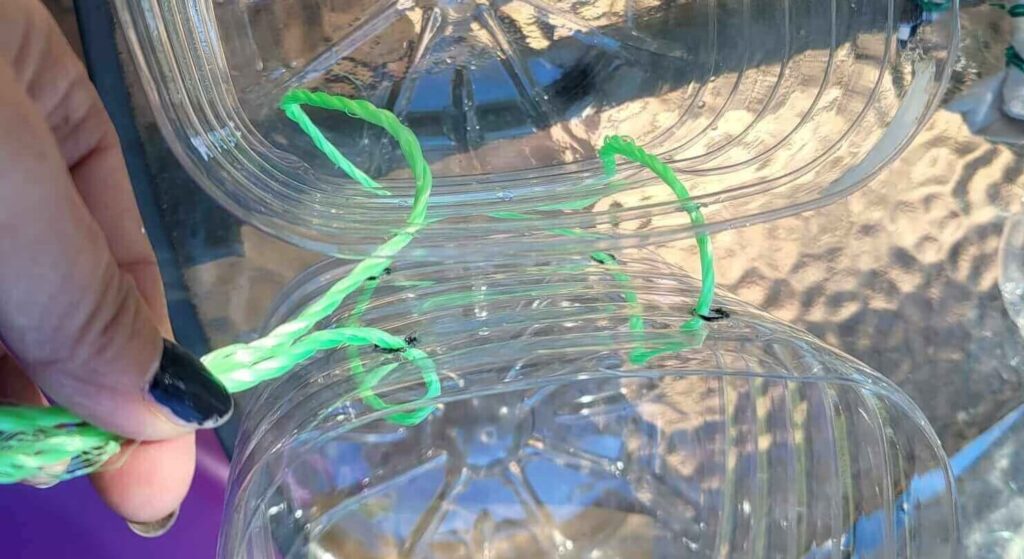
Method 2: The Cord System (Capillary Action)
If you prefer slower, more controlled watering, the cord method is unbeatable.
- Prepare the cord: Use a thick cotton cord.
- The reservoir: Place a bottle filled with water slightly above the level of the pot.
- The connection: Insert one end of the cord into the bottom of the bottle and bury the other end a couple of centimeters into the soil of the pot.
- How it works: Water will travel through the cord to the dry soil via capillary action. Pure physics at your plants’ service!
Adjusting the Drip Rate
If you find the water runs out too quickly, try these tricks:
- Smaller holes: If you’re using the cap method, make sure the hole is as small as possible.
- Add a sponge: Insert a small piece of sponge inside the cap to slow down the flow.
- Depth: The deeper the cap is buried in the soil, the more resistance the water will encounter, making it flow slower.
Conclusion: Happy Plants, Healthy Planet
DIY drip irrigation is a simple, inexpensive, and extremely effective way to care for your plants while saving resources. You don’t need expensive sensors or complex installations; a couple of bottles and a little ingenuity are all it takes to become a sustainable gardener.
Related: Homemade Organic Fertilizers: 5 You Already Have in Your Kitchen